If your company uses or wish to use other hierarchy than Epic → Story/Task → Subtask, after reading this article, you’ll be able to use such hierarchy in Panorama.
How to define custom hierarchy in Panorama:
(if you have your custom issues defined and linked to one another in Jira, omit points 1-2)
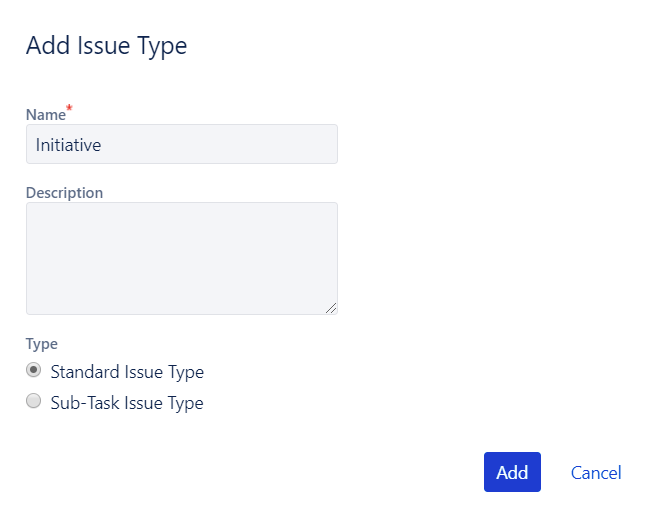
:1. Add a new issue type in Jira. To do so, navigate to Issue Types configuration page. We’ll add an Initiative for the purpose of this tutorial.
2. Add a new link type that will connect these issues together in Jira.
3. Go to the Panorama. Open settings page of a panorama to which you want to apply the custom hierarchy (click on the locker icon next to the panorama name or select edit option from panorama’s options on the dashboard).
4. Define your custom hierarchy - same as in Jira. Select an issue type and a link that connects it to other issue type. You can keep the standard Jira hierarchy while having your custom rules defined.
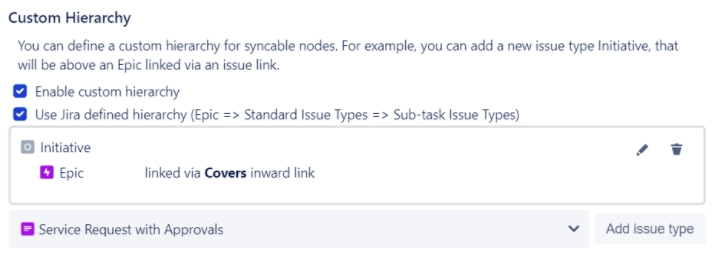
5. Your hierarchy is now defined!
Using custom hierarchy in Panorama
You can create or drag an Initiative (or any custom hierarchy element) into your Panorama. Make sure that the issues are synced. It’s indicated by the green refresh icon on the right.

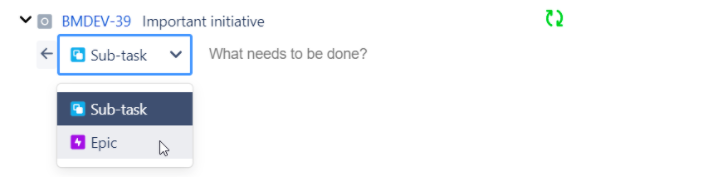
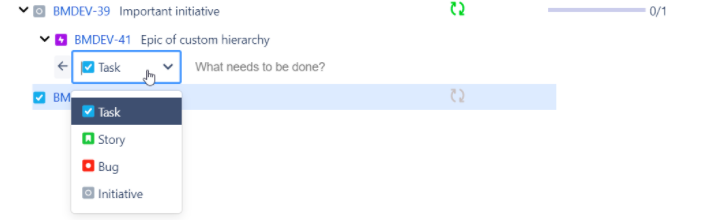
If you want to create any issue in Panorama, it will display the available issue types. While creating a child issue, the available child issue types are listed according to your custom hierarchy.
If you kept the standard Jira hierarchy along with your rules, you can still create stories, tasks and bugs under Epics.
| Info |
|---|
When a custom hierarchy is once defined and used in Panorama, it can be reused later. While creating the next panorama, in the hierarchy step choose “In a previously saved custom hierarchy” and select any hierarchy that was used before. |