This site is moving soon to become part of an integrated Appfire documentation and information site for our apps. This site will remain available during the transition to our new and improved site. Once this site is moved over, this banner will be updated with the new site link for easy access.
Take a look here! If you have any questions please email support@appfire.com
Project goals
- Arkadiusz Glowacki
Create a goal
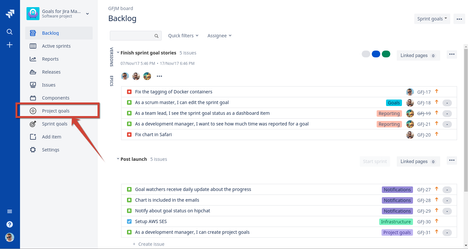
To create a project goal navigate to Jira Project Board (like scrum or kanban board) and select Project Goals from a project sidebar:
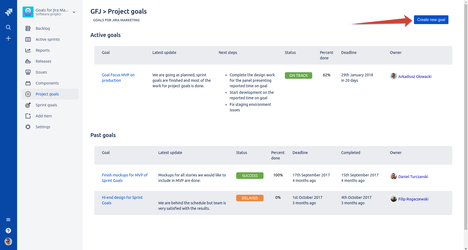
You will be present with a view presenting active and past goals for particular project. On right top of the page you can find Create new goal button that will bring a dialog for creation of new project goal:
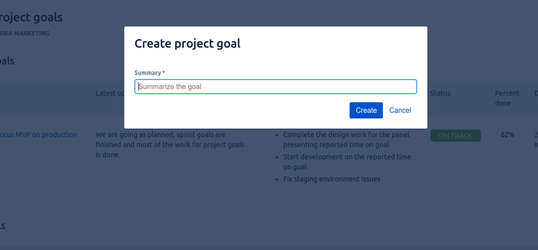
It is enough to fill a summary field to create a new project goal. All goal attributes like owner, deadline, etc. can be filled incrementally later. Click the Create button and you will be taken to the page with goal details:
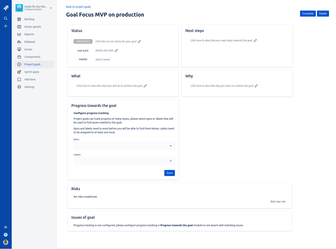
This page consist of several modules, right after creation they will be empty and can be filled with data. To read more please check Goal Modules.
Complete a goal
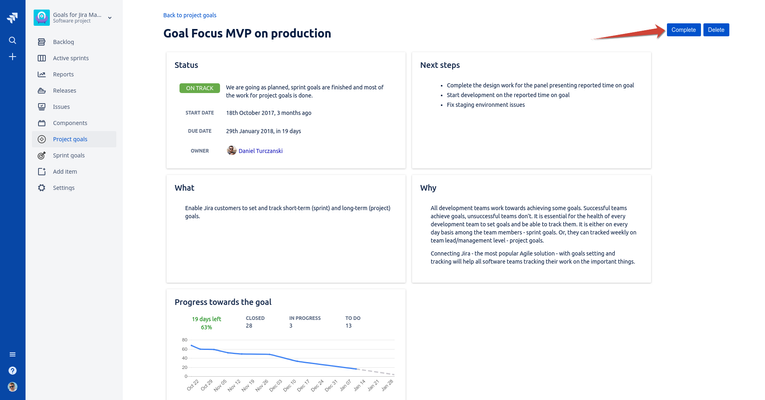
To complete a project goal you need to navigate to the Project Goal Details page, then on the right top of the page you should see Complete button (unless goal is already completed, then Complete button won't be visible and Reopen button should be present). After clicking on the Complete button you will be present with a dialog letting you to set completion status.

Delete a goal
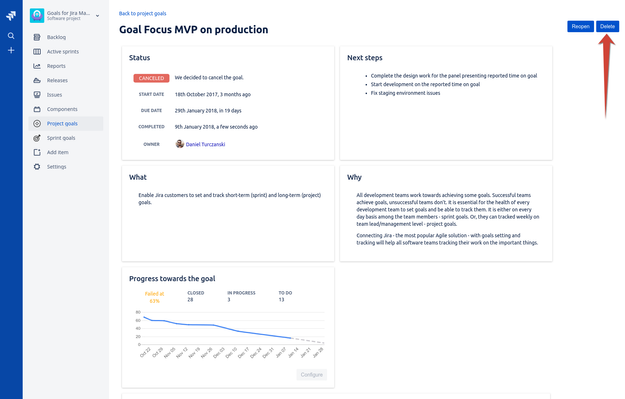
To delete a project goal you need to navigate to the Project Goal Details page, then on the right top of the page you should see Delete button. After clicking on the Delete button the goal will be deleted, you will be taken to the Project Goals page and notification about successful goal deletion will be displayed with UNDO action that allows you to revert goal deletion (for example if you clicked delete by mistake).

Goal Modules
Status
This module is designed to hold status about your project goal. Here you can define the deadline for the goal, person responsible for it (the owner) and write a quick status message connected with a status badge letting everyone know how are you doing with the goal.
What / Why / Next steps
What, why and next steps modules are used to describe your goal in more details than summary. In What module you should describe what are you going to do in the scope of this goal, in Why module describe your reasons to achieve the goal and in Next Steps module describe your very next steps you will take to achieve the goal. To set values in description modules simply click on the gray placeholder message (see clip below).
Progress towards the goal
Project goal can track progress of many issues and present accumulated progress on the goal. Issues can be connected to the goal based on Epics they belong to and Labels. You can select multiple epics and multiple issues and issues with at least one of selected epics or labels will be connected to the goal. For example if you select epics: Notifications, Infrastructure and labels: Mockups then issues with Mockups label will be connected to the goal (even without any epic) and issues with Notifications or Infrastructure epic will be also connected. After selecting your epics and labels click Save and you will be present with a line chart showing goal progress - initially the progress line will lay down on the bottom because our server in the background will connect issues to the goal (You will be present with a message: "We are calculating the progress to reflect configuration changes.." and a spinner to inform you about background task). After background service is done with connecting issues the progress chart will reload and present you with actual goal progress.

Risks
Risks module let you define and describe risks that you need to control to successfully finish the goal. You can add many risks to the project, each risk contains its status, description and mitigation plan.
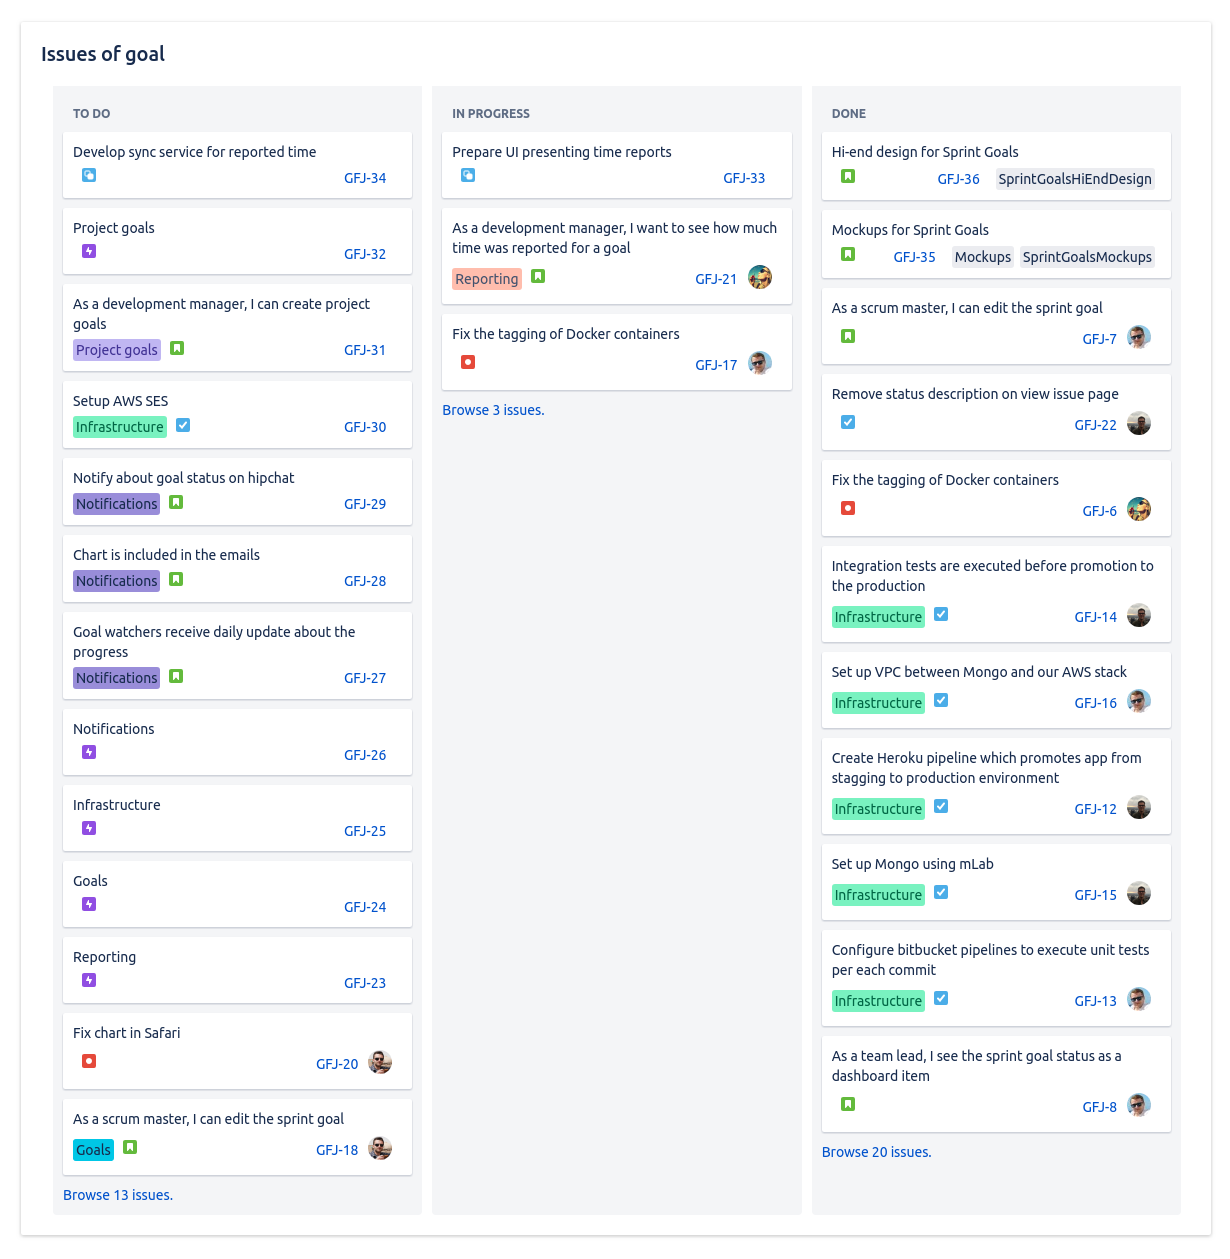
Issues of goal
Issues of goal module presents not interactive board that gives you overview of which issues are still to be done, which are in progress and which issues were completed. The columns in the board have 3 states: TODO, IN PROGRESS, DONE and they are reflecting status categories not statuses. Each status in Jira has assigned status category which defines whether this status represents issues in progress, waiting or done. For example if you created a custom status in your project called QA Review and gave it a status category In Progress then this status will not appear directly as a column on the board, but issues in this status will be visible in IN PROGRESS column.
Because project goals can track hundreds or thousands of issues we are not rendering all of them here, issues that are done or still waiting in todo are limited to 15 issues, but we display all issues that are in the progress. Additionally under cards with issues, when at least one card is present in the column you can find link Browse N issues which will take you to Jira Issues Navigator where you can browse all the issues that are connected to the goal and are in particular status category.
Board has only presentational purpose and it is not possible to transition issues.